برنامج تعليمي للتحكم الدودي ثلاثي الأبعاد للوحدة
في هذا البرنامج التعليمي، سأعرض كيفية إنشاء وحدة تحكم دودة بسيطة في Unity، مستوحاة من سلسلة دروس تطوير الألعاب للمبتدئين TornadoTwins.
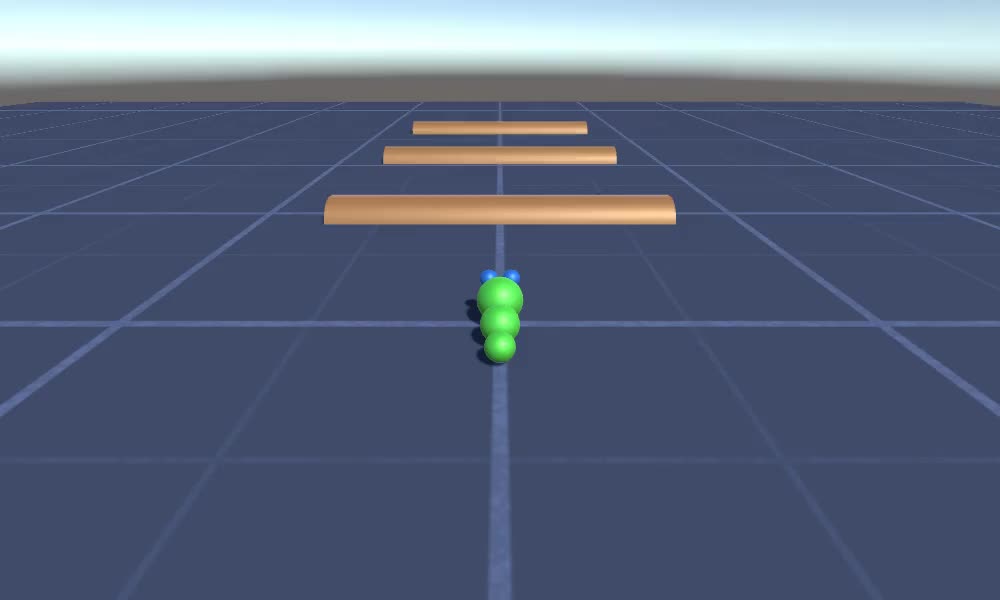
سوف تنزلق وحدة التحكم الدودية مع تأثير سلس لتتبع الذيل ولديها القدرة على القفز.
تمت كتابة البرامج النصية في هذا البرنامج التعليمي في الأصل بلغة JavaScript (المعروفة أيضًا باسم UnityScript) والتي لم تعد مدعومة، لذا سأقدم بديلاً C#.
لإنشاء وحدة تحكم دودة في Unity سنحتاج إلى:
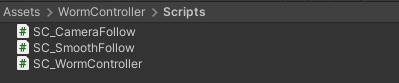
- إنشاء البرامج النصية اللازمة
- إنشاء شخصية دودة
- تعيين البرامج النصية للشخصية
الخطوة 1: إنشاء كافة البرامج النصية اللازمة
لنبدأ بإنشاء جميع البرامج النصية اللازمة لإعداد وحدة التحكم الدودية:
- قم بإنشاء سكريبت جديد، وأطلق عليه اسم "SC_WormController" والصق الكود أدناه بداخله:
SC_WormController.cs
using System.Collections;
using System.Collections.Generic;
using UnityEngine;

[RequireComponent(typeof(CharacterController))]
public class SC_WormController : MonoBehaviour
{
    public float speed = 3.0f;
    public float rotateSpeed = 1.0f;
    public float jumpSpeed = 5.0f;
    public float gravity = 9.8f;

    CharacterController controller;
    Vector3 moveDirection;

    // Start is called before the first frame update
    void Start()
    {
        controller = GetComponent<CharacterController>();
    }

    // Update is called once per frame
    void Update()
    {
        // Rotate around y - axis
        transform.Rotate(0, Input.GetAxis("Horizontal") * rotateSpeed, 0);

        // Move forward / backward
        Vector3 forward = transform.TransformDirection(Vector3.forward);
        float curSpeed = speed * Input.GetAxis("Vertical");
        float movementDirectionY = moveDirection.y;
        moveDirection = forward * curSpeed;

        // Jumping
        if (Input.GetButtonDown("Jump") && controller.isGrounded)
        {
            moveDirection.y = jumpSpeed;
        }
        else
        {
            moveDirection.y = movementDirectionY;
        }

        // Apply gravity. Gravity is multiplied by deltaTime twice (once here, and once below
        // when the moveDirection is multiplied by deltaTime). This is because gravity should be applied
        // as an acceleration (ms^-2)
        if (!controller.isGrounded)
        {
            moveDirection.y -= gravity * Time.deltaTime;
        }

        // Move the controller
        controller.Move(moveDirection * Time.deltaTime);
    }
}- قم بإنشاء سكريبت جديد، أسميه "SC_CameraFollow" وألصق الكود أدناه داخله:
SC_CameraFollow.cs
using System.Collections;
using System.Collections.Generic;
using UnityEngine;

public class SC_CameraFollow : MonoBehaviour
{
    /*
    This camera smoothers out rotation around the y-axis and height.
    Horizontal Distance to the target is always fixed.

    There are many different ways to smooth the rotation but doing it this way gives you a lot of control over how the camera behaves.

    For every of those smoothed values we calculate the wanted value and the current value.
    Then we smooth it using the Lerp function.
    Then we apply the smoothed values to the transform's position.
    */

    // The target we are following
    public Transform target;
    // The distance in the x-z plane to the target
    public float distance = 10.0f;
    // the height we want the camera to be above the target
    public float height = 5.0f;
    // How much we
    public float heightDamping = 2.0f;
    public float rotationDamping = 3.0f;

    void LateUpdate()
    {
        // Early out if we don't have a target
        if (!target)
            return;

        // Calculate the current rotation angles
        float wantedRotationAngle = target.eulerAngles.y;
        float wantedHeight = target.position.y + height;
        float currentRotationAngle = transform.eulerAngles.y;
        float currentHeight = transform.position.y;

        // Damp the rotation around the y-axis
        currentRotationAngle = Mathf.LerpAngle(currentRotationAngle, wantedRotationAngle, rotationDamping * Time.deltaTime);

        // Damp the height
        currentHeight = Mathf.Lerp(currentHeight, wantedHeight, heightDamping * Time.deltaTime);

        // Convert the angle into a rotation
        Quaternion currentRotation = Quaternion.Euler(0, currentRotationAngle, 0);

        // Set the position of the camera on the x-z plane to:
        // distance meters behind the target
        transform.position = target.position;
        transform.position -= currentRotation * Vector3.forward * distance;

        // Set the height of the camera
        transform.position = new Vector3(transform.position.x, currentHeight, transform.position.z);

        // Always look at the target
        transform.LookAt(target);
    }
}- قم بإنشاء سكريبت جديد، وأطلق عليه اسم "SC_SmoothFollow" والصق الكود أدناه داخله:
SC_SmoothFollow.cs
using System.Collections;
using System.Collections.Generic;
using UnityEngine;

public class SC_SmoothFollow : MonoBehaviour
{
    // The target we are following
    public Transform target;
    // The distance in the x-z plane to the target
    public float distance = 10.0f;
    // the height we want the camera to be above the target
    public float height = 5.0f;
    // How much we
    public float heightDamping = 2.0f;
    public float rotationDamping = 3.0f;

    // Start is called before the first frame update
    void Start()
    {
        if (!target) return;

        transform.LookAt(target);
    }

    void LateUpdate()
    {
        // Early out if we don't have a target
        if (!target) return;

        // Calculate the current rotation angles
        float wantedRotationAngle = target.eulerAngles.y;
        float wantedHeight = target.position.y + height;

        float currentRotationAngle = transform.eulerAngles.y;
        float currentHeight = transform.position.y;

        // Damp the rotation around the y-axis
        currentRotationAngle = Mathf.LerpAngle(currentRotationAngle, wantedRotationAngle, rotationDamping * Time.deltaTime);

        // Damp the height
        currentHeight = Mathf.Lerp(currentHeight, wantedHeight, heightDamping * Time.deltaTime);

        // Convert the angle into a rotation
        var currentRotation = Quaternion.Euler(0, currentRotationAngle, 0);

        // Set the position of the camera on the x-z plane to:
        // distance meters behind the target
        transform.position = target.position;
        transform.position -= currentRotation * Vector3.forward * distance;

        // Set the height of the camera
        transform.position = new Vector3(transform.position.x, currentHeight, transform.position.z);

        // Always look at the target
        transform.LookAt(target);
    }
}
الخطوة 2: إنشاء شخصية دودة
الخطوة التالية هي إنشاء شخصية دودة:
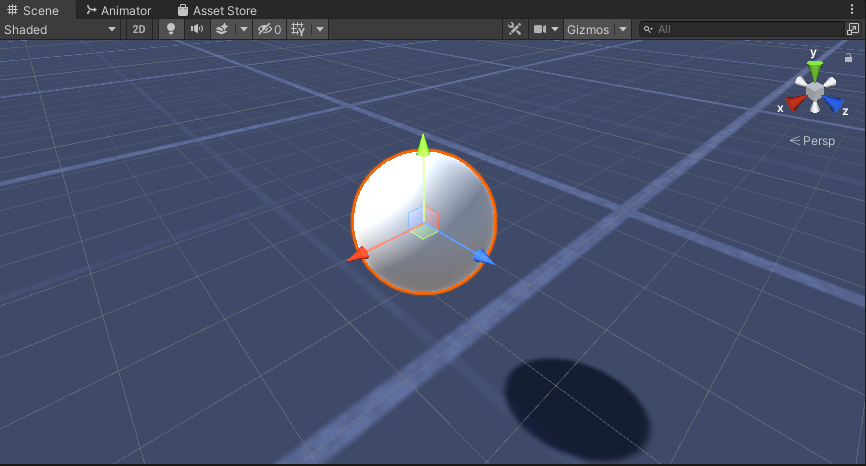
- قم بإنشاء Sphere جديد (GameObject -> 3D Object -> Sphere) وقم بتغيير موضعه إلى (0، 0، 0)، واحذف مكون SphereCollider الخاص به، وأعد تسميته إلى "Worm"
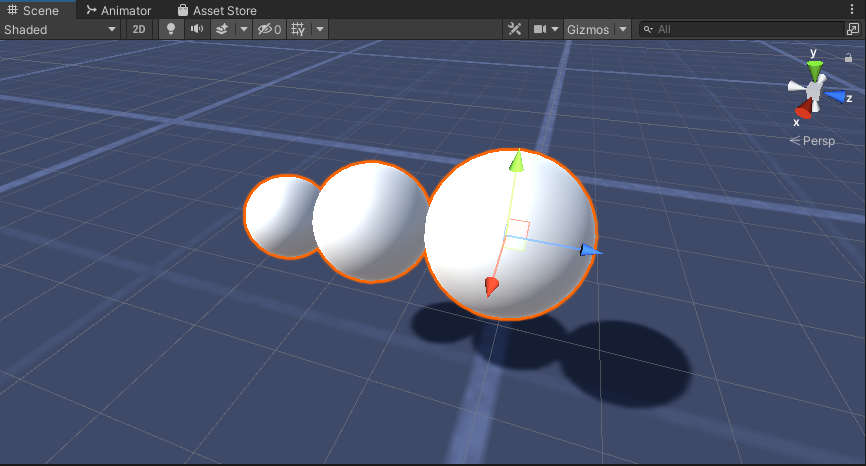
- قم بتكرار الكرة "Worm"، وأعد تسميتها إلى "BodyPart1"، وغير موضعها إلى (0, -0.1, -0.9)، وغير مقياسها إلى (0.8, 0.8, 0.8)
- قم بتكرار الكرة "Worm" مرة أخرى، وأعد تسميتها إلى "BodyPart2"، وغير موضعها إلى (0, -0.2, -1.6)، وغير مقياسها إلى (0.6, 0.6, 0.6)
- انقر بزر الماوس الأيمن على الكائن "Worm" -> إنشاء فارغ وأعد تسمية الكائن الذي تم إنشاؤه حديثًا إلى "Eyes"
- قم بتكرار الكرة "BodyPart2"، وأعد تسميتها إلى "Eye" وانقلها داخل الكائن "Eyes"، وغير موضعها إلى (-0.24، 0.353، 0.324) وغير مقياسها إلى (0.4، 0.4، 0.4)
- قم بتكرار الكرة "Eye" وقم بتغيير موضعها X إلى 0.24
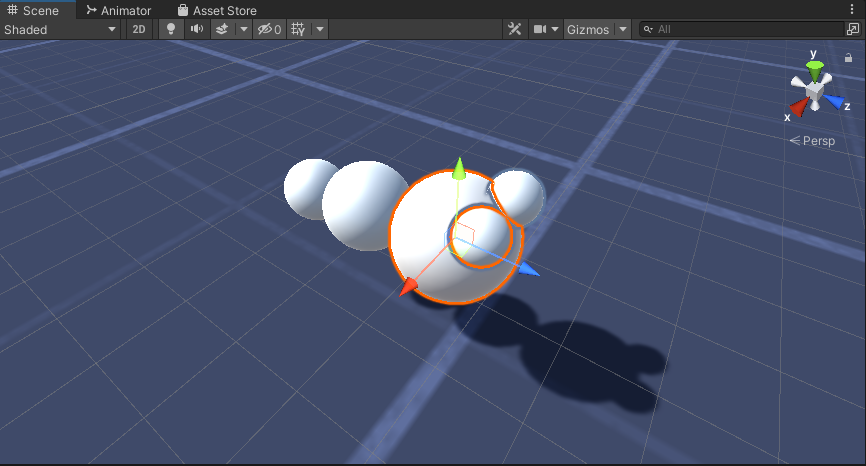
- بالنسبة للتصور، يمكنك إنشاء بعض المواد، على سبيل المثال، الأخضر للجسم والأزرق للعيون.
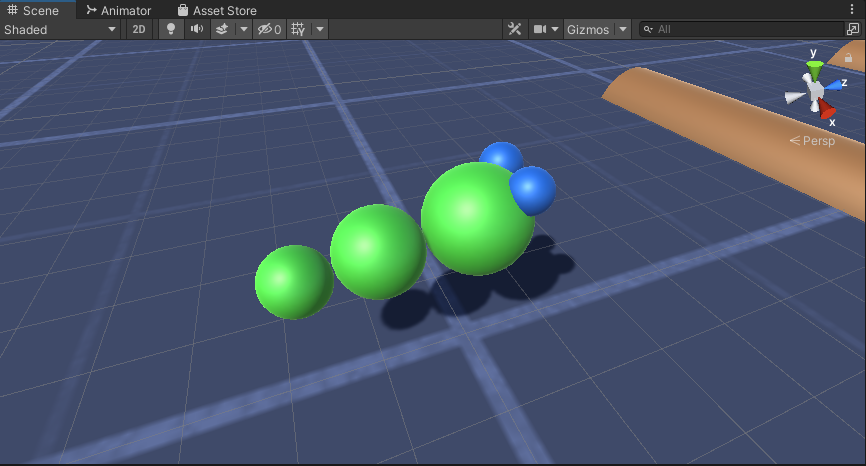
شخصية الدودة جاهزة.
الخطوة 3: إعداد وحدة التحكم الدودية
الخطوة الأخيرة هي تعيين البرامج النصية:
- قم بإرفاق البرنامج النصي SC_CameraFollow بكائن الكاميرا الرئيسية وقم بتعيين "Worm" Sphere للمتغير الهدف:

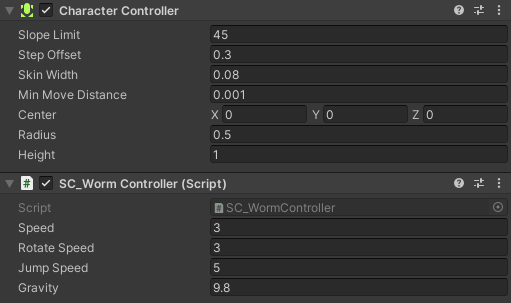
- قم بإرفاق البرنامج النصي SC_WormController إلى المجال "Worm" (سيضيف تلقائيًا مكونًا آخر يسمى CharacterController):
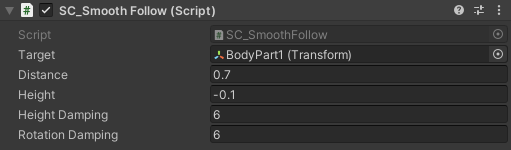
- قم بإرفاق البرنامج النصي SC_SmoothFollow بالكرة "BodyPart1" وقم بتعيين قيمها كما في screenshot أدناه:
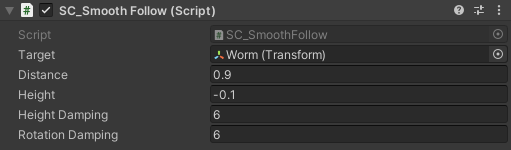
- قم بإرفاق البرنامج النصي SC_SmoothFollow بالكرة "BodyPart2" وقم بتعيين قيمها كما في screenshot أدناه:
وحدة التحكم جاهزة الآن، استخدم W وA وS وD للتنقل ومسافة للقفز.
المصدر Unity الحزمة متاحة أدناه.